
Amazon returns most new sellers’ inventory because of inadequate packaging or wrong shipment plan.
To tackle this, we have curated an easy guide with many resources that will help you pack and ship your inventory without further complications.
So let’s dive into the first step necessary for the shipment process.
Phase 1: Shipment plan
When a seller plans to send their inventory to Amazon FBA, they need to create a detailed shipment plan that helps them pack things accordingly.
You can use the below-mentioned points as your initial checklist:
- Which exact products are you planning to send to Amazon?
- How much quantity are you sending for each product?
- Which shipment method are you relying on, along with the carrier details?
- Do you wish to prepare and label your inventory or let Amazon do the process?
Feeding into the system:
Step 1: Go to ‘Manage Inventory’ and select all the products you plan to ship.
Step 2: From the drop-down menu, select ‘Send/replenish inventory.’ Upon entering the page, choose ‘Create a new shipment plan.’
Step 3: Go to ‘Add to shipping plan’ and select an open plan.
Step 4: Confirm your ‘Ship-from’ address by adding your inventory location. If you usually work with suppliers, you can put their addresses for a more swift process.
Step 4: Start conforming to the type of products you are shipping to Amazon. Kindly note that an ASIN with multiple parts should be shipped with a single package.
Step 5: After selecting the product, set in quantity and start your packaging process.
Phase 2: Preparing products

Preparing products is one of the most crucial steps as the safety or return of your products depends on your preparation.
It is the seller’s responsibility to ship the products to Amazon safely.
Amazon has detailed prep guidance that will help you understand the suitable packaging for different types of items like liquids, adult products, apparel, powders, etc.
FBA Prep Service:
If you want Amazon to prepare your products meticulously, kindly select ‘Amazon’ under the ‘Who Prepares’ column.
FBA usually prep products with a single EAN or UPC that completely corresponds to ASIN under Amazon’s catalog. Even if you select ‘Amazon,’ ensure that your products are well packed to reach the Amazon warehouse.
Packing essentials:
Poly bagging
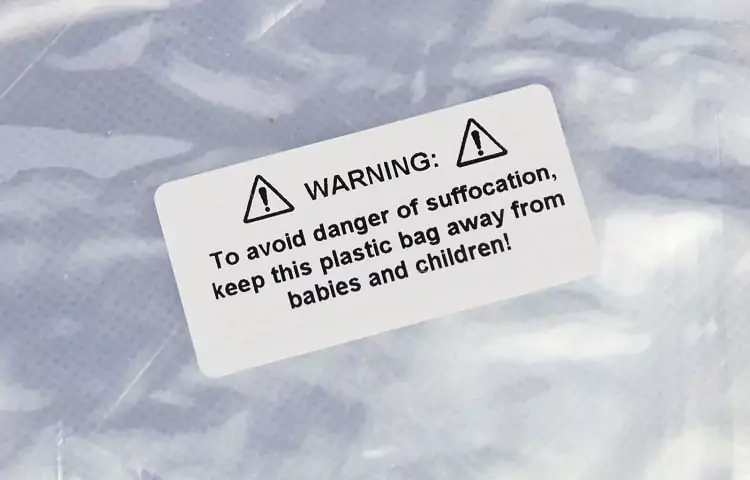
You are required to wrap your products by poly bagging them. This type of bagging ensures no powders or liquid gets leaked during transit.
Ensure that your bag has a suffocation warning printed on it, primarily if it measures 5 inches when laid flat. Adult products should always be packed using an opaque or black poly bag.
Poly bagging is your first layer of packaging, and no seller should avoid poly bags as a part of their packaging structure.
Bubble Wrap
Products that require bubble wraps like fragile glass or ceramics should be tightly wrapped and taped to avoid the article from falling during the shipping process.
In addition, the barcode label should always come on the outside. Even dense or heavy products require bubble wrap to prevent breaking or harming other products in the shipment.
Overboxing
Amazon requires double-boxing for items that are prone to cause damage during shipping and handling.
Sharp products that puncture the packaging, fragile items, and hazardous chemicals should be considered suitable candidates for double-boxing.
If a product requires over boxing, you need to place a fully wrapped box inside another box for extra added protection. If your product weighs more than 10lb, use thick double-walled corrugated boxes for packing.
Hangers
Amazon allows mini hangers for baby clothes, but a seller should remove standard-sized hangers.
Items that do not need hangers:
- Accessories
- Hats
- Shorts
- Lingerie
- Socks
- Sweaters
- Swimwear
Items that do need hangers:
- Suits, blazers, or jackets
- Dresses that are priced more than $299.99 per item, especially with embellishments
- All skirts, pants, and sleepwear with a price of more than $299.99 per item
- Genuine leather, real fur, or wool outerwear that costs more than $299.99 per item
Taping
Products that have a chance of leaking should be additionally taped.
For example, extra taping on lids prevents spilling out the product and adds a layer of protection from tampering.
Phase 3: Labeling the products
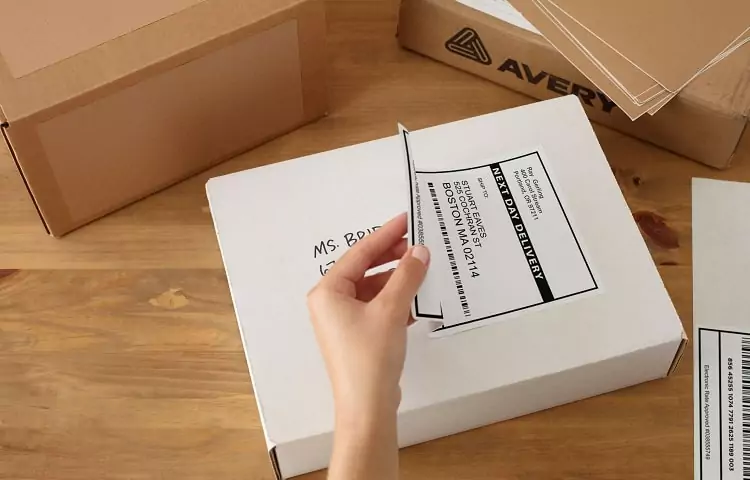
The entire fulfillment process runs smoothly because of barcodes. As a dedicated Amazon seller, it is your responsibility to label each product with a bar code for smoother tracking and further distribution by Amazon.
Always ensure that your labels are placed on a flat surface for easier reading. Avoid labeling your products and masking the entire product with bubble wrap. Instead, stick the label on top of the bubble wrap.
A seller should pay particular attention if the product is small in shape. Sticking the label on a curve/corner will make the process of reading the barcode impossible.
There are three options for labeling your products:
- You can apply Amazon barcodes directly to your product.
- You can use existing EAN or UPC barcodes for numerous eligible products.
- You can rely on the FBA Label Service so Amazon can apply the barcodes for a per-item.
To Print quality barcodes:
- Use accurate label stock for your printer.
- Clean and replace the printhead as and when needed.
- Use a good printer with a minimum resolution of 300 DPI.
- Keep a habit of testing the scannability of your barcodes.
Steps to create your barcodes:
Step 1: On the Seller Central account, select the label stock that you wish to use.
Step 2: Change the number on the ‘# of labels to print’ column according to your requirement.
Step 3: Once you are done with the products and quantity, select the ‘Print labels‘ option. Clicking the option will generate a PDF file which you can download to create labels.
Phase 4: Double-check everything before sending

You can double-check your entire shipment information on the ‘Review shipments’ page. Always remember that the shipping plan will automatically change the number of items for your shipment if there is a change in the order.
For example, if you plan to add fourteen items of a single product to your shipping plan, it will automatically result in two loads of seven articles each.
If you later change the quantity from fourteen to nine, your shipment will get updated, but the shipment pattern will remain the same, i.e., seven items in one and two in the second shipment.
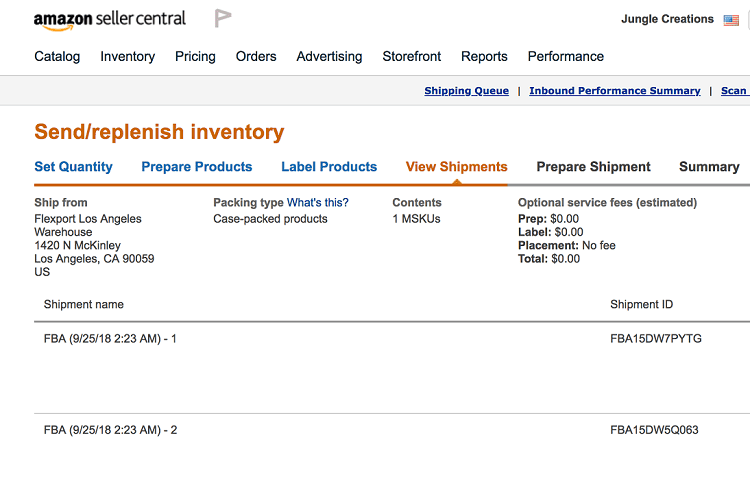
Your ‘review shipments’ page will showcase the shipment details like:
Shipment name: This shipment name is assigned based on the time, date, and number of shipments. You have the freedom to change the name before you send your shipment.
Shipment ID: An ID will be automatically created for each shipment.
MSKU: The details of each stock are included in the shipment via a Merchant Stock Keeping Unit list.
Units: The total quantity of each MSKU in each shipment.
Ship to: The exact location and center number of the fulfillment center.
After going through the complete shipment details, you can click ‘Approve Shipments’ to finalize the shipment plan. Ensure that you have confirmed the entire shipment before clicking the button.
If you want to save the hassle of shipping to multiple fulfillment centers by yourself, you can sign up for FBA Inventory Placement Service. This service will make your shipment process easy as you will select only one shipping address. Amazon will later route your products to different fulfillment centers for you.
Phase 5: Sending the shipment

Click on the ‘Prepare Shipment page’ to finalize the options of:
- Selecting your shipping method and carrier
- Determining the number of boxes needed
- Scheduling the shipment and payment for the same
- Printing box labels
You must note that while shipping your package, you should meet all the Amazon FBA requirements. You can easily modify any slight changes before the shipment, but we highly recommend canceling to recreate a new one if there’s a huge change.
Shipment category
- Amazon’s Small Parcel Delivery (SPD) is usually for small items packed in individual boxes.
- Less Than Truckload (LTL) refers to packages that are secured and stacked on a pallet.
- A Full Truckload (FTL) is a dedicated truck for your entire stock. It does not take any halts and directly arrives at the fulfillment center.
Most sellers fall under LTL as they do not possess enough inventory to fill an entire truck for an FTL shipment. A seller should be aware of these categories before selecting the option. You can refer to this page for all the specific requirements for each type.
Summary page
The summary page is your main and last leaflet that has four elements. You can use this page to keep track of all the following things:
- Shipment events
- Track shipments
- Shipment contents
- Reconcile
Taxes
It is crucial to note that Amazon is not responsible for any taxes and duties. Ensure that you have prepaid your taxes and taken care of the customs duty.
Sellers should pay any extra charges or costs in advance for a smoother transit. If you fail to pay any of the charges in advance, Amazon has the right to reject your shipment upon arrival.
Conclusion
We hope this Amazon shipping guide provided you a clear insight into the shipping process.
New sellers are typically scared to send their first shipment because of the lengthy steps. But with our guide and a few rounds of shipments, the whole process will soon become second nature to you.
Resources: